Vintage Map Ornament

I know we haven’t even gotten to Thanksgiving yet and I promise I won’t bombard you with Christmas stuff until after the turkey has been digested! But in case you are getting ready to decorate your tree or for you snowed in readers who have already started, I have a little ornament crafting tutorial for you. In fact, I have 35 inspiring ornament tutorials from some of my fellow blogging friends for our Trim the Tree Blog Hop!

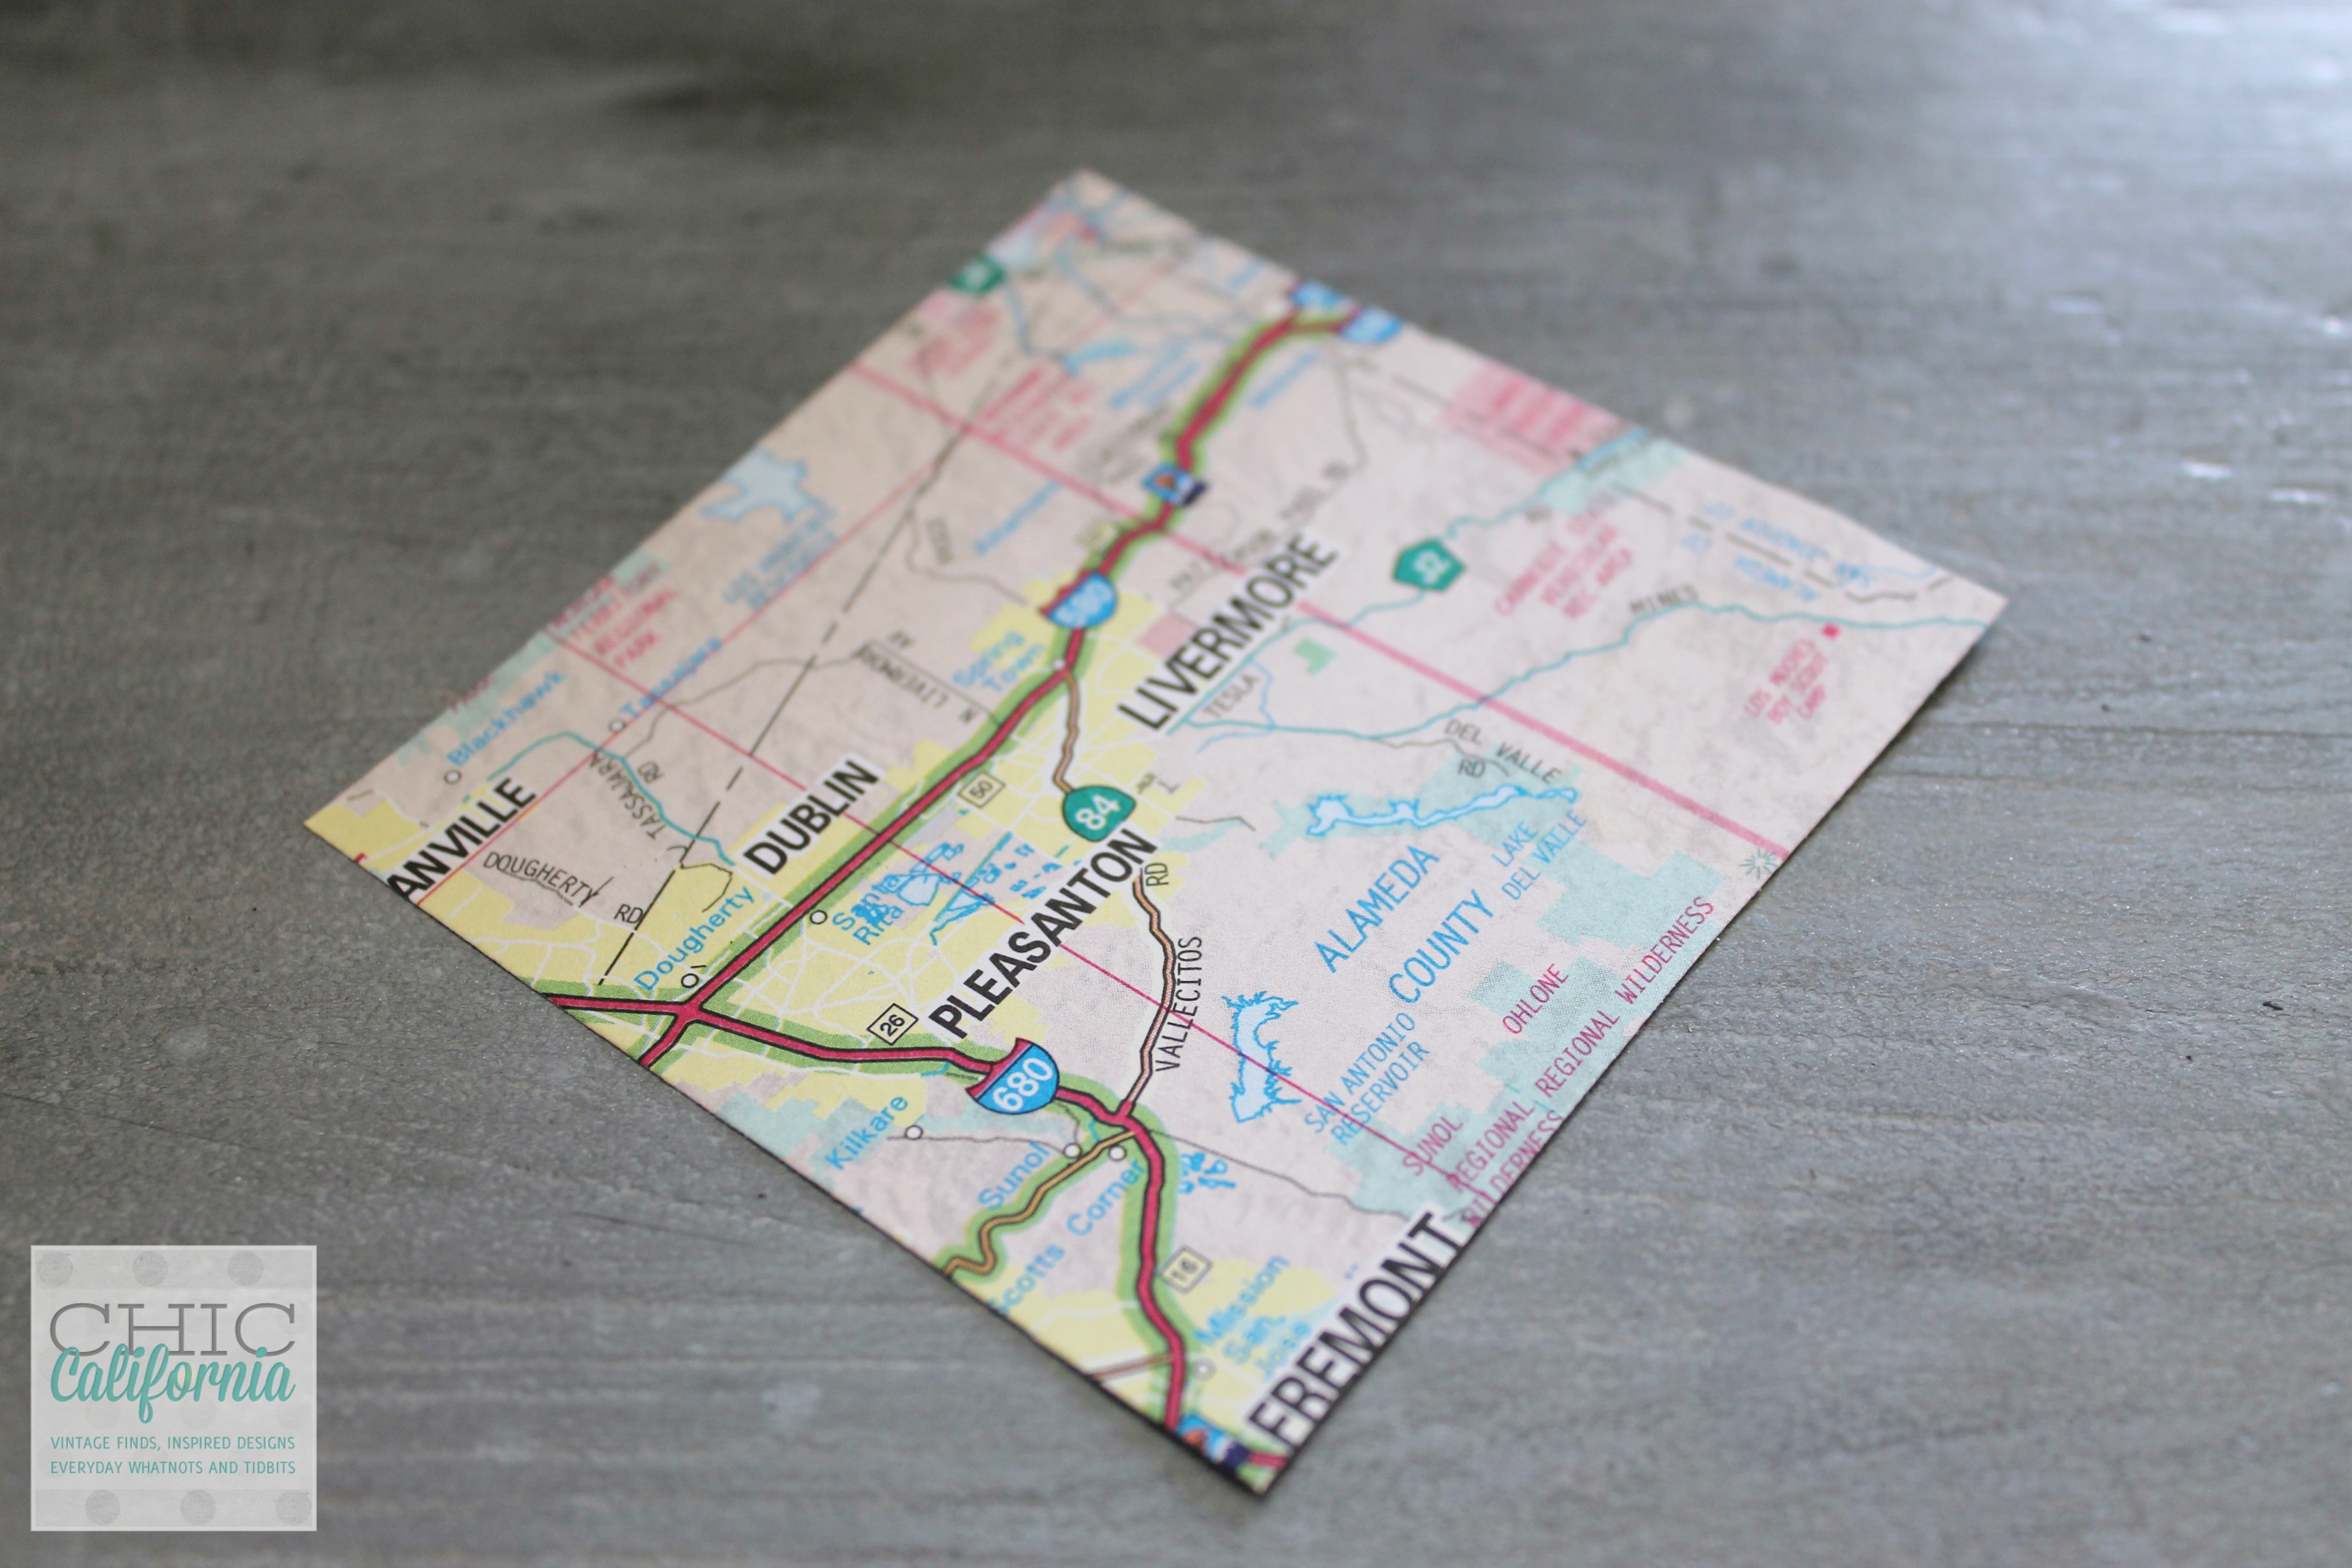
I love vintage maps and they are really easy to find and really cheap! You can cut them up, scrapbook and craft with them and not feel the least bit guilty that you are ruining something old. (Unless it’s an ancient treasure map, don’t cut that one up!) Here’s what you are going to need to make your vintage map ornament:
Hot glue gun (I bought mine at Glue Guns Direct)
Ribbon for hanging ornament
55 3″ squares cut from your map
Are you ready to start folding? I won’t lie, this is pretty time consuming but you can totally do this while watching tv or waiting for the turkey to thaw. Also, make your ornament personal. Use a map from your home town or home state. Or this would be a great gift for a friend that has moved away as a keepsake.

Your first fold should be corner to corner to make a triangle.

Next fold each corner up to the top of your triangle. Use a bone folder or the edge of your credit card or something to crease your lines so that they are really flat.
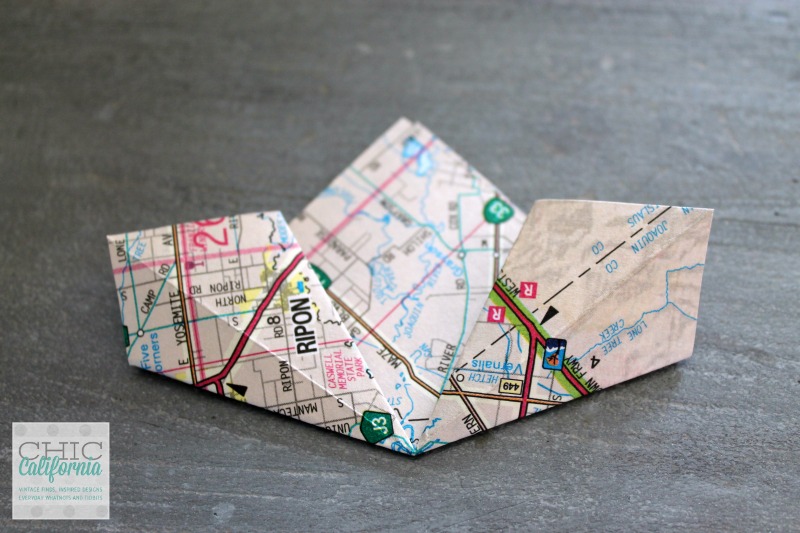
This is probably the trickiest of the folds. Take those corners that you just folded up and open them up and down so that they form a kite shape.

Then take those corners on each side and dog ear them down.

Last fold! Fold the kite shape in half right down the center.

Roll the edges together and hot glue the facing sides together.

Repeat the folding process on 4 more squares so that you have 5 separate leaves.
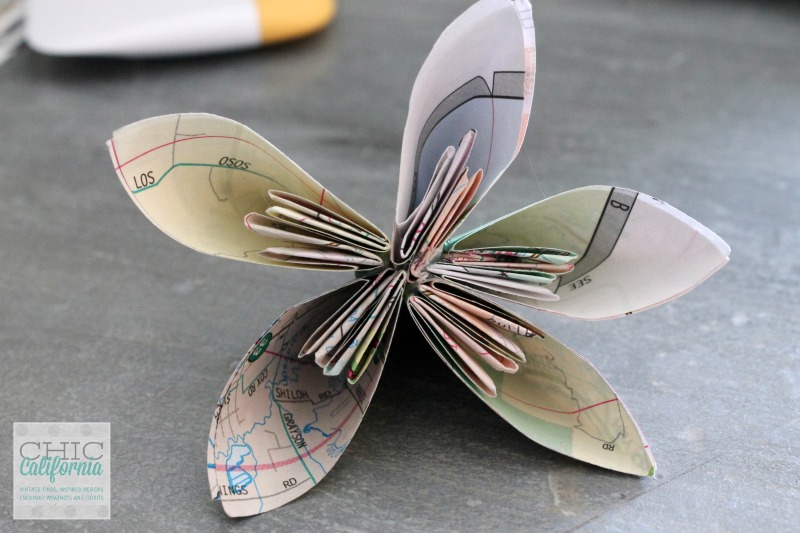
With your hot glue gun, glue each individual leaf to the other in the center. You will create a flower with your sections.

When you have 3 flower groups completed you will glue them together as well at the outside.

Gather your leaves together into a group of 3 and glue them together. Where each flower leaf meets another leaf, give it some glue.

When you get a few of the groups together cut a piece of ribbon, fold it over and glue it into the center of your groups. Then continue to add your additional groups. Keep doing this until you make 11 groups of flowers. You will keep gluing each group to the previous group. As you get near the end you will need to match up the corners of your flowers kind of like a jigsaw puzzle. Just adjust and fit each group in before you glue. You will see it all come together into a round ball, I promise! When you are done you will have a lovely keepsake ornament for your tree or for a friend.


Need More Holiday Ideas? Check out these posts.


Gorgeous! Love the tutorial, makes it seem less daunting! It’s been fun “hopping” with ya!
Okay. You win the award for coolest ornament ever! I love that you used maps to make it. So much fun!
Pinning and sharing!
~ Ashley
Wow, what an amazing and beautiful idea for Christmas. You did a fabulous job! I LOVE this!
If you haven’t already popped by to join in with this weekend’s Say G’Day linky party please do join us and share your beautiful craft idea!
Best wishes,
Natasha in Oz
Wow! These are amazing! Love that they’re made from maps! Thanks so much for sharing at Your Turn To Shine! Hope you come back again and share any of your posts with us on Thursday. Happy Thanksgiving!
Thanks for joining the Say G’Day linky party. I’ve just pinned your post!
Happy Thanksgiving!
Best wishes,
Natasha in Oz
Such a fun ornament. I have a ton of old maps because I just love them! This is a great idea to do with them. Pinning! Thanks for sharing on Show Me Saturday!
I love that the first image is of a map with my home town on it!!!
I love this idea! I’m trying to make one for a professor of mine and I’m having a hard time with the “kite fold” that’s the trickiest. Would you mind explaining it to me? Thanks!
Hi Marissa, so before the kite step, you have two triangle folds in the step before. Those make a pocket so to speak. You want to open those folds up, out and down. So put your finger inside one of those triangles, and pull it down and at the same time push it down and create new creases. What was once the side of your triangle is now the center fold of the kite. Hopefully that isn’t more confusing!
Worked wonderfully as a Christmas present for my parents! I am a teen and my sister and I were able to make this easily (in about an hour and a half) with old travel maps I had kept! Thank you so much for sharing, it turned out really beautifully 🙂
Yea! I’m so glad it turned out so well! what a great idea to make one for your parents for a Christmas present.